Showing posts sorted by relevance for query star wars. Sort by date Show all posts

Friday, September 28, 2012

Star Wars Tee

I've been having some trouble getting my act together this week after the excitement of last weekend when my twin nephews were born (!). I barely got anything on my to-do lists done while we were waiting for news at the hospital, and then this past week the kiddo has been acting more needy and childish -- most likely a reaction to my oohing and aahing over the new babies -- so I simply haven't had the energy to do more than the bare minimum of chores. I didn't even get to sew my 3-year-old nephew's birthday present, which I'd planned to finish and mail by Monday or Tuesday. (Fun fact: I now have three nephews with birthdays within three days of each other.)

So yesterday, I chose to wear something slightly out of the ordinary to kick-start my day. For one thing, I wore a skirt on a weekday (it's usually shorts or jeans). For another, I wore this shirt:

Dress: Star Wars via Zulily | Skirt: Old Navy | Flats: Blowfish via Amazon

It's such a great shirt and would be perfect if it included Princess Leia (a terrible oversight, I know!). Anyway, it's a pretty simple outfit, but it made me smile. :-) We love Star Wars in this house in case you hadn't noticed. Along with a couple of long-sleeved Star Wars shirts for the kiddo, I bought this shirt via the discount program Zulily (similar to Gilt but targeted to moms). It's actually a child's XL size, so the neck is a little narrow, but it was fun to wear even though hardly anyone outside my family saw it except for, briefly, the teachers and other parents and children at the kiddo's school. I was in there just long enough to sign my name in and out; there's usually no dawdling.

As for the rest of the day, I managed to get my eyebrows waxed, then fold three loads of laundry while watching the Netflix movie I'd been putting off for the past month.* But way more fun than that, for breakfast I made some blueberry waffles with the waffle iron that my mom gave us a couple of weeks ago (she also gave us a panini press that I love -- I'll talk more about these two appliances another time). I'd never made waffles before and it turned out to be quite easy, which was a welcome surprise. And the kiddo loved the waffles. I'll be making more and freezing them for my brother and his wife to help them out these first few weeks of taking care of twin babies. I can definitely recommend the Cuisinart brand Classic Waffle Maker if you're in the market to buy one.


xo, Gladys

* In case you were interested, the film I saw was Shame with Michael Fassbender and Carey Mulligan, rated NC-17; don't worry, I watched it while the kiddo was in school. There are lots of scenes that are basically porn except there's no "money shot" and it's really sad and sometimes tragic. So yeah, definitely not porn. It wasn't very pleasant to watch, but it did make me more empathetic to those suffering with sexual addiction. The director and writers did a pretty amazing job toeing the line between gratuitous porny sex scenes and telling a sad and difficult story about a man who (it's implied) has had a horrible, probably-abusive childhood and who is painfully lonely (even if he looks like Michael Fassbender!).

Monday, May 21, 2012

Sewing: Star Wars Envelope Pillow Cover

(ETA: I now have a step-by-step tutorial on making an envelope pillow cover with French seams.)


This was the next fun project I did after finishing the art smock the week before:

Yoda Jedi Master pillow cover

Making envelope pillow covers is fast and easy -- perfect for beginners. I made this pillow cover using two different Star Wars prints (purchased here) for a nephew's 5th birthday. I'd do a tutorial but there are so many good ones out there already. Here's a quick video tutorial to show you the basics of making a simple cover so you know how many steps it takes and what the project is supposed to look like during construction. (For instructions on making one with trim, see here).

The only things that I did for this pillow that required extra steps were to 1) measure and cut out my fabrics in a specific direction (in this case, both the Yoda panel and the back cover fabric had prints that worked best in one orientation, right way up) and 2) use French seams in the construction.

The size of the Yoda panel dictated the size of the pillow. Thankfully, it was almost perfect for a 16" x 16" pillow form. Given the size of the pillow form, you need to add an extra square inch to the fabric dimensions to get the correct size for the front cover. In this case, I needed to cut a 17" x 17" square of fabric. Cutting out the panel was a little dodgy because it wasn't printed on the fabric perfectly straight; if you look at the finished cover closely at the edges, you can see the unevenness and slight parallelogram shape of the whole thing. This bugged me, but I think it looks good enough and so do my critics in the house. :-)

For the back of the cover, you need two rectangular pieces. Add 5 inches to one of the dimensions to create enough overlap for the envelope, then cut the fabric in half across the longer dimension. In this case, I knew I wanted my envelope flap to cut across the pillow horizontally, so I cut a rectangular piece of fabric that was 17" wide x 22" tall -- and then I cut this in half to get two rectangular pieces that were each 17" wide x 11" tall. Then I hemmed the 17" wide raw edges that would create the envelope. Here is the wrong side of my envelope flaps, hemmed and already overlapping:


To make the French seams, I pinned the two envelope flaps to the front piece, wrong sides together and aligning the raw edges. I sewed around the whole square with a 1/4" seam allowance. I trimmed the seam allowance to 1/8", trimming diagonally at the corners without cutting into the thread to reduce the bulk when turning the corners.


I flipped the cover wrong side out and I pressed (ironed) the edges, using my fingers (or you can use a dull pencil or a bodkin if you have one) to push out the fabric along the seams and at the corners to create sharp edges. I then stitched all around the cover with a 1/4" seam allowance.


I flipped out the cover to the right side and pressed the new edges, again using my fingers to create sharp edges. I stuffed the pillow in there and voila, it was done!

Earlier, I did a practice pillow using the fabric that my kiddo picked out himself when we went to Joann's around Valentine's Day. He said he liked this better than the Star Wars pillow. Well, what does he know? He's only 4, and addicted to chocolate. It is cute, though. :-)


xo, Gladys

Monday, July 2, 2012

Tutorial: Star Wars Envelope Pillow Cover

(ETA: I've updated this tutorial to create sharper corners while using French seams. See steps #5-8.)


With Darth Vader this time! (See my Yoda pillow cover here.) This was for a 6-year-old boy's birthday. Lots of boys in my life are digging Star Wars right now, which is nice because I'm digging it, too. :-) He got some Star Wars LEGO sets for his birthday this year, so I thought I'd augment those with a pillow. I asked his mom if he'd prefer Yoda or Vader, and she said Vader. The Darth Vader panel looks kinda retro with the flame-y lettering and the cheesy lava in the background, but the character after all was born in the late-1970s. Overall, I'm liking this vibe. (And, you know what, I don't think I ever realized just how skeleton-like Vader's mask has always been.)

Note: I hesitated to call this a tutorial because 1) it's so simple and 2) lots of tutorials for envelope pillow covers are all over the internet. However, because it had been a month since the last time I made a pillow cover, I felt like I needed a refresher. And since I liked the way I did it last time -- French seams and all -- I thought it would be a good idea to put together a more thorough post on making a pillow cover, at least for ME in the future, hence the use of the word "tutorial." If you have any questions or would like to point out any confusion with my instructions, let me know in the comments or via email. Thanks!

Envelope Pillow Cover Instructions
For a 16" x 16" square pillow form*

Fabric:
  • 17" x 17" square of fabric for the front
  • 17" x 22" rectangle of fabric for the back (if your fabric pattern is one-directional, make sure that the fabric dimensions are 17" wide and 22" tall)
* If you want to use a different-size pillow form, remember to add an inch to both the wide and the tall dimensions for the seam allowance. For example, for a 20" x 20" pillow form, your front fabric dimensions will be 21" x 21", and your back fabric dimensions will be 21" wide x 26" tall.


Method:

1. Cut your back rectangular fabric in half width-wise. You should now have two pieces measuring 17" x 11" each. These will overlap to make the "envelope."


2. Hem the bottom of the top piece: fold and press to the wrong side by 1/4". Fold again and press by 1/2", and pin. Edgestitch at the inside folded edge (i.e., sew close to the edge). Hem the top of the bottom piece in the same way. Don't forget to backstitch at the beginning and end of your seams.

This time I double stitched my hems, about 1/4" apart, for extra security. I sewed the first seam with a smidgen more than 1/4" seam allowance, and then I edgestitched the second seam. See a closeup of how it's supposed to look here.


3. Wrong sides together, align the bottom back piece with the front fabric. Pin along the bottom edge.


4. Wrong sides together, align the top back piece with the front fabric, overlapping with the bottom back piece. Pin along the top edge. Then pin along the sides, making sure to catch all three layers when you pin the overlapped back pieces. Pin the middle of the envelope for more security while sewing.


5. Sew around the edges with a 1/4" seam allowance, creating four separate seams (one on each side) that stop and start about 3/8" from the edges. You need to backstitch at the beginning and end of each seam. To speed up the process, you can use the "chain piecing" method wherein you don't snip the threads before before turning the corner and starting the next seam. (See photo below.)

6. Trim the edges down to 1/8".

7. Once all four sides are seamed, flip the pillowcase inside out and make sure the corners are opened out (there should be a hole at each corner; see photo below). Press the edges flat as close to the seam as possible. You can use the dull point of a knitting needle to help with this.

8. Sew along the edges continuously with a 1/4" seam allowance, pivoting at the corners and backstitching at the beginning and end of the seam. After that, snip the unseamed corners to reduce bulk, making sure not to cut into any seams. (See photo below.)


9. Flip the pillowcase right-side out, use a knitting needle to help push out the corners sharply (though be careful not to poke a hole through the fabric), stuff the correct-size pillow in there, and you're done!


I really love how clean the French seams look. Although I put this tutorial together mostly for me, I hope it proves useful for you, too. May the Force be with you on your sewing projects. :-)

xo, Gladys

Tuesday, February 5, 2013

Doctor Who Tees

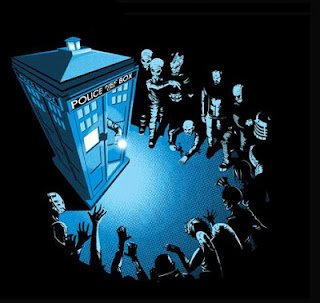
I have a confession. I've been buying fan-art Doctor Who t-shirts almost whenever I come across them. It's all Facebook's fault. While on FB one day in November, I noticed one of the ads with a Doctor Who-themed tee on it, and of course I clicked. The link took me to a site called TeeFury, which sells a different t-shirt design each day for $10. You only have 24 hours to buy that particular t-shirt. For one day after that, if there are still some left, you can buy the t-shirt for $13 ... but there is a new t-shirt design on the front page. The thing is, it's a geek/nerd/fangirl's paradise for t-shirts, with lots of clever mashups and fantastic illustration, everything from Star Trek to Star Wars, Adventure Time, X-Files, Indiana Jones, Breaking Bad, Hello Kitty, Harry Potter, Big Bang Theory, and lots of other cultural phenomena that I'm less familiar with. Check out their gallery of past designs. It's insane.

(Click on the images below to go to the TeeFury site.)

So I snagged the one that Facebook linked to that day -- with the TARDIS framed by all of the Doctor's enemies -- and I've been hooked since. I've bought four other tees to date. That's a lot of graphic tees for someone like me who usually acquires that many over the course of a year!

One of them made me laugh: Daleks, the Doctor's worst enemy, pretending to be the Doctor of different incarnations. I can just imagine that loud, grating, robotic voice plaintively shouting "Im-per-son-ate! Im-per-son-ate!" (instead of the usual "Ex-ter-min-ate!" in case you didn't know).

This tee I oh-so-generously gifted to Shirl, one of the MotleyFlue, who is also a DW fan like me. The tee depicts the verrry-hot David Tennant as the 10 of Hearts (being the 10th Doctor). Swoon.

My most recent purchase was a twofer, since it was a competition between two Doctor Who tees -- the one to the left is called "Bad Landing" and below that is "Time Fiction" (after Pulp Fiction, get it? *g*). I liked them both and since they were the usual $10 each I decided to go for it.

Given that the official DW tees from ThinkGeek cost twice as much (and the designs aren't as clever as TeeFury's fan-made designs), these are a steal. Plus I like the feel of the fabric itself, which is a soft stretchy cotton knit. I'm usually a size Small but I buy the women's tee in Medium, and it's comfortable and a little loose (which is what I prefer in the "baby tee" style) rather than form-fitting.

There are even a few DW designs that I missed and sort of regret:

Most recently the River Song tee. I love River Song's character. I wasn't in love with this particular design (it barely looks like her) but there are so few RS items that depict her face/body that now I wish I'd gotten it. Oh well.

Then there's this totally adorable design made to look like a knit sweater pattern. It would have been the perfect cheeky graphic tee for winter. I'm not sure how I missed this but I'm sorry about it.

And this one didn't strike me as that interesting at first, but 1) it's a different color than the usual black or navy blue of the other TeeFury tees offered and 2) I'm a fan of French, of David Tennant's Doctor (who said this phrase all the time), and of the typography wrapped around the sonic screwdriver. Why in the world didn't I buy it? I think maybe it was because it was too subtle. At the time it came out, I probably wanted my graphic tees to loudly and obviously proclaim my love for DW. Now I wish I had this one as well.

And by the way, I did buy some Doctor Who fabric from Spoonflower in December, just a couple of fat quarters (this and this). I still haven't figured out what to do with them -- people have made aprons, clutches, purses, and tote bags among other things. We'll see what finally inspires me. :-)

xo, Gladys

Sunday, May 4, 2014

Chapter Draft Done!

OK, this is not an academic blog, but I'm so relieved to be done that I'm posting a Wordle of my chapter! I always do one of these Wordle things when I finish a chapter. Over 14,000 words, baby!


Oh, and you know what today is, right? May 4 ... Happy Star Wars Day! May the 4th be with you. (As it was with me, I suppose. Yay for being done! Though it almost burst my bubble when I realized that the last time I did one of these was YEARS ago. Yikes. But hey, I'll let it roll off my back. On to the next -- and last -- chapter ... after some rest and relaxation, that is. I need more sleep!)

xo, Gladys

Thursday, April 26, 2012

Birthday Haul

Instead of giving me one huge present for my birthday this year, my husband decided to give me a series of smaller presents over the course of April. I got my first gift on April 1, and I got the last gifts during my birthday party. Getting my gifts this way definitely made the whole month special for me! And I really loved the presents he chose -- catering to my Anglophilia, haha! -- most of which weren't even on any of my wish lists. But I totally love them all!

Doctor Who Encyclopedia (most recent edition, December 2011). Of course, you can browse the encyclopedia online, an advantage of which is the fact that the online version is more promptly updated. However, I love having the physical book -- with all the awesome pictures -- ready at hand to flip through whenever I feel like it. I leave the book on the coffee table for everyone and anyone to enjoy.

Downton Abbey DVDs, both Season 1 and Season 2 (unabridged UK versions; the PBS versions were apparently edited for showing in the US). Since we don't have DVR/Tivo at home, we weren't able to record the second season of Downton Abbey when it aired on PBS. (And we can no longer be bothered to sit down in front of the TV at specific times.) So we decided to wait to watch the second season until it came to Netflix. But now we don't have to! I can't wait to sit down with the hubby and with my girlfriends sometime to re/watch both seasons.

LEGO Harry Potter game for the Wii (Years 1-4). I'd been saying for a while now that I wanted to get this game. I've been a fan of Harry Potter since the first book came out in the US. So, a very long time. My old room at my parents' house was PACKED with HP paraphernalia, like hanging Hedwig owls and bookends and pen and paper sets. I have hardcover, softcover, and CD audio versions of the series, and of course I have the movies as well. After I realized I enjoyed playing the LEGO Star Wars Wii game with my kiddo, I wanted to get Harry's version. Now we have it. :-)

Owl apron and washi tape from ModCloth. These were both on my wish list. The apron is ridiculously awesome, made by a brand with the also-awesome name Kitsch 'n' Glam. I love, love, love the pattern, and the fabric is very sturdy, almost canvas-like. The pockets that open into the center panel of the apron are a very nice touch. And yes, it really gives you an attractive shape when you put it on, just like you see on the dress form. I was so impressed that I went ahead and bought myself the matching oven mitt. I want to figure out a way to replicate this apron pattern and make it myself!

Jane's Austen's Sewing Box. I opened this one during my party, where a couple of my friends -- also Jane Austen fans -- were able to witness it. I definitely need to sit down with this book and go through each project carefully. I want to try making a bonnet, though my friend M thinks bonnets from that period were actually pretty ugly (mashed in the back and whatnot). But I think they're charming, as Mr. Bingley would say!

Vintage shot glass made in the shape of a thimble, with the words JUST A THIMBLE FULL embossed on it. This was another present that I opened during the party, and it made for some laughs. It is adorable. Plus, I am a "lightweight" when it comes to drinking so I could get totally drunk on that much (hard) liquor. But I didn't use it that night, and I don't think I could ever use it since I want to simply put it up on a display shelf and laugh to myself whenever I walk by. (By the way, the headband that looks like a fascinator and the bracelet were gifts from my friend E that day. It really was one of my most favorite birthday parties.)

xo, Gladys

Thursday, July 25, 2013

Family Summer


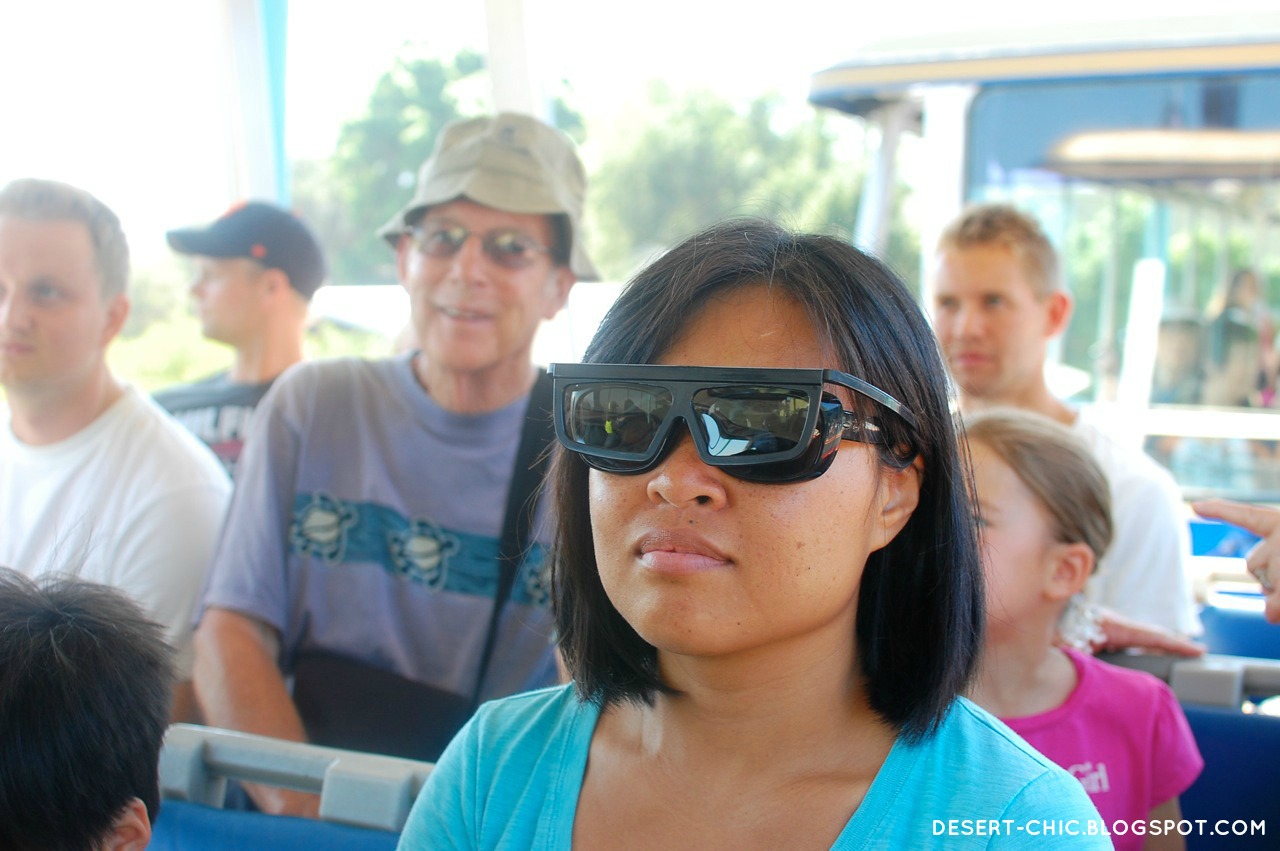
A couple of weeks ago, my husband's brother visited us with two of his children (his wife and two youngest kids stayed home in Utah). It was a long, fun, and very hot weekend. A minor-league baseball game on "Star Wars night" plus fireworks during which I had to hold my hands over my poor son's ears. A trip to a plant nursery that, weirdly, featured a huge model train layout -- almost a whole town built by the collective crafty hands of a local model train club. A first-time visit to a small museum of impressive old fighter jets. Then a family barbecue and a trip to Universal Studios in Hollywood. This is what summertime is all about. This and ice cream.

xo, Gladys

Thursday, March 8, 2012

Birthday Extravaganza

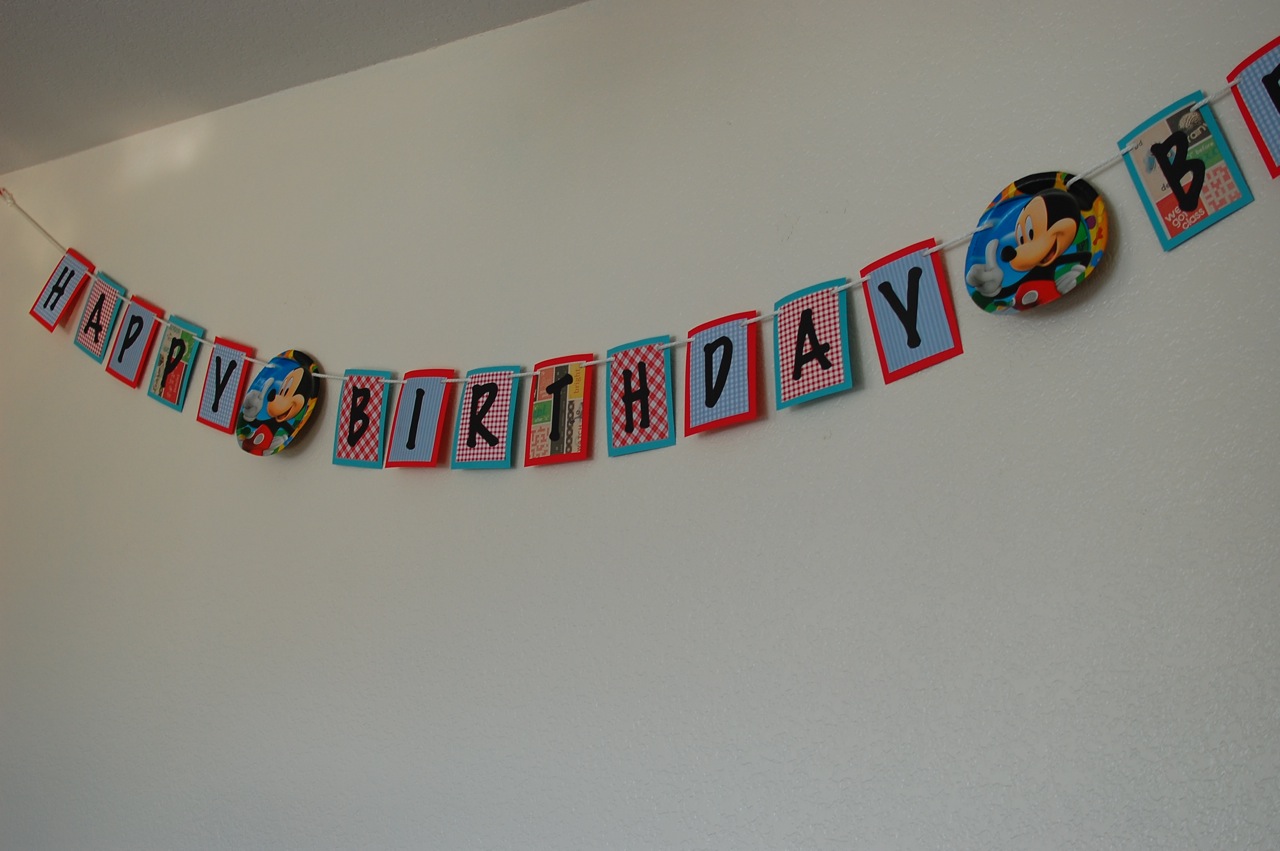
Hand-made birthday banner

We are still recovering from my now-4-year-old's birthday parties this past weekend. Yes, I wrote PARTIES, as in plural. Well, two to be exact, but they were back-to-back, one on Friday night for our local friends and the other on Saturday afternoon for our extended family from Long Beach. My husband described preparing for the second party as changing out the riders on a carnival ride, where you're putting the ride back together and cleaning out whatever needs to be cleaned out for the next set of people in line. I thought that was funny, and pretty apt.

Both parties were really fun, though. This new house lends itself to partying much better than our old house did. We even managed to do piñatas, one for each, inside the house. We weren't sure about the weather (it's been pretty windy and sometimes rainy over here), so the hubby built a contraption made of a wooden beam and strong nylon cord to hang and control the piñatas in the large entrance hallway. I'm relieved that none of the kids managed to hit a wall or lamp with the stick, but there were a few close calls there. Point is, they had a lot of fun, which is what we were aiming for.

Here's Party #1:

Learning how to play Lego Star Wars on the Wii


Glow sticks for a night party

Homemade brownie cake

Photobombing his piñata time
(Details: Dress: YA Los Angeles via ModCloth | Cardi: I.N.C. via Macy's)


Hanging out


Here's Party #2:

I love how this photo of the 2nd party matches the one above of the 1st party

Cookies 'n cream with devil's food cake from Coldstone Creamery
(Details: Top: Kasper via Macy's | Cardi: AGB via Macy's | Jeans: GAP)

The hit that broke the piñata

Bonus photo of the kiddo's haircut a week before the party. The stylist offered some color, and he asked for green. Early happy St. Patrick's Day!


xo, Gladys
Related Posts Plugin for WordPress, Blogger...