Showing posts with label house. Show all posts

Tuesday, May 7, 2013

Birthday Haul

Last year, I shared the awesome birthday presents that my husband gave me (geekery extravaganza!). This year he gave me Seasons 1-3 of Community AND made a generous payment towards my purple polka-dotted Derby Swirls currently on layaway at the Melrose store. I'll share pictures of those once I have them in my hot little hands! For today, I thought I'd share some of the lovely presents I got from other dear people in my life.

This shoe cubby bench (exact) came from my parents-in-law. It's perfect for our entranceway. No more shoe clutter in a house where we take our shoes off at the door. And it's a great place to set things down and sit for a spell. We'll have to replace those dinky little Ikea stools with something else, but we've got time to look.

E's presents spoke to the foodie in me. There was more delicious chocolate in her gift bag, but it was quickly and pleasurably consumed. That Bubble Bakery soap smells ridiculous (in a good way). The sweet coconut smell is so strong and real that it seems edible.

M's presents spoke to the crafter in me. This array of goodies was very inspiring. I love the framed snapshot of our group of mommy friends. I can't wait to go through the magazine, but most of all, I can't wait to try out the awesome vintage patterns she managed to find! I just wish I had MORE TIME. I'll probably try the plaid jumper pattern first.


ETA: I forgot to take a pic of these beautiful rice bowls from my friend MC. MC's house and household goods are just what I like, and these delicate little bowls showcase some of her tasteful style. I absolutely adore the colors!

xo, Gladys


Follow Desert Chic on Bloglovin

Tuesday, April 23, 2013

Recipe: DIY Home Cleaners

It's springtime, and if you're like me, you've gotten the itch to do some spring cleaning. So I spent a good chunk of my birthday weekend cleaning the house, but instead of reaching for the Kaboom or Tilex or 409, I learned new recipes for homemade cleaners that actually worked! I was able to clean my tubs, kitchen sink, and stove without taking a whole day or two to do it. I confess that I often put off cleaning those things because I'm really sensitive to the chemical smells from the store-bought sprays and cleaners that we usually use, which means that I need to take numerous breaks while I wait for my eyes and nose to stop watering. Ugh. Two of the recipes below call for ammonia, which does smell pretty bad, but it doesn't bother me as much as the factory-made chemical soups that burn your mucous membranes (what do they put in those things?). You can even buy lemon-scented ammonia from the grocery store, home improvement store, or maybe Target.

Anyway, I'm so excited about how effective the cleaners were that I wanted to share my resources. I'm sure I have Pinterest to thank for starting me off on my journey to finding them online, and I'm glad to let you know that these particular projects worked. (Parenthetically, a friend alerted me to a site called Pinstrosity, which lets you know about projects found via Pinterest that either don't work or that require troubleshooting.) What's great is that you probably have the necessary items in your home already! And if you don't, you can easily get them at the store and they're a lot cheaper ounce for ounce than the ready-made factory stuff.


To clean my porcelain tub, I used the "Tub Scrub" recipe from Martha Stewart. Four ingredients: 1) baking soda, 2) dish soap, 3) antibacterial essential oil, and 4) water. I only needed half the recipe to clean one tub. The tea tree oil I used made it smell wonderful. I used a non-scratch nylon scrub brush with the paste. You don't need to wet down the tub before scrubbing, since the paste has enough liquid already to create the necessary friction. It required some elbow grease, but it was satisfying; I could see the dirt melting away. It worked wonderfully on the metal faucet and drain as well, but make sure to completely rinse off the baking soda or it will leave streaks.

For my porcelain kitchen sink, I used Apartment Therapy's recipes. Three ingredients for a simple scrub: 1) baking soda, 2) ammonia, and 3) water. I didn't use a bucket of water, but it was definitely more liquid than a paste. It worked really well to clear up the dinginess, and the sink was squeaky clean and whiter after just one application with a non-scratch nylon sponge. With a toothbrush, I used the mixture to clean the metal drains and strainer as well as the rubber flaps on the garbage disposal. The metal looked almost new after that! (I think it was because of the ammonia.) There were some small rust stains that needed the salt-and-lemon-juice treatment, as described in the Apartment Therapy link, and after that I was done. The sink is only a year and a half old (I blogged about it when we bought it), but I admit that I don't take care of the porcelain finish as well as I should. Doing this treatment made me want to take better care of the sink in the future, because why not when it's so quick and simple? (If you've got a metal sink, use this Apartment Therapy tutorial instead.)

Finally, I used my own recipe on my gas stove, especially on the removable porcelain-covered cast-iron grates. For years, I have hated cleaning stove grates because nothing ever worked, not vinegar, dish soap, or the Magic Eraser. The recipe I used was just a remix of the two recipes above: 1) 1/2 cup baking soda, 2) 1/4 cup ammonia, 3) 1 teaspoon dish soap, and 4) just enough water to make a paste. I removed the grates and scrubbed them in the sink with the paste using a nylon sponge. It didn't make them super clean but it took a lot of the burned-on grease right off. (The ammonia really melts off the grease, and I wish I'd learned to clean with ammonia long before my thirties. I've heard you can put the grates -- one at a time -- in a ziplock back with a little ammonia and leave for a day, and then you wouldn't need to scrub. I might try that method since I don't need to use all the burners of my stove every meal of every day.) I washed them off thoroughly and left them on the dish rack to dry. While they dried, I worked on the stove with the nylon sponge. Again, this required some elbow grease, but it worked well. I made sure to rinse off the paste completely, using several applications of a very wet sponge and then drying off with a clean microfiber towel.

NOTE: When using the recipes with ammonia, I advise using rubber gloves, especially if you'll be in contact with it for more than a few minutes. That smell can linger a bit. And please, don't mix ammonia with bleach or anything containing bleach as the fumes created are highly toxic. If unsure whether something contains bleach or not, err on the side of not using it with ammonia. Just stick to baking soda, dish soap, and essential oils when working with ammonia. They work!

Happy fume-less Spring cleaning!

[EDIT: So I was wrong about Pinterest being my primary resource ... the Martha Stewart "Tub Scrub" recipe was found via BuzzFeed's great list of (mostly) eco-friendly cleaning tricks. Seriously, this list will make your Spring cleaning more interesting. I can't wait to try cleaning my blinds with an old sock.]

xo, Gladys


Follow Desert Chic on Bloglovin

Monday, March 4, 2013

Dinosaur Birthday Party


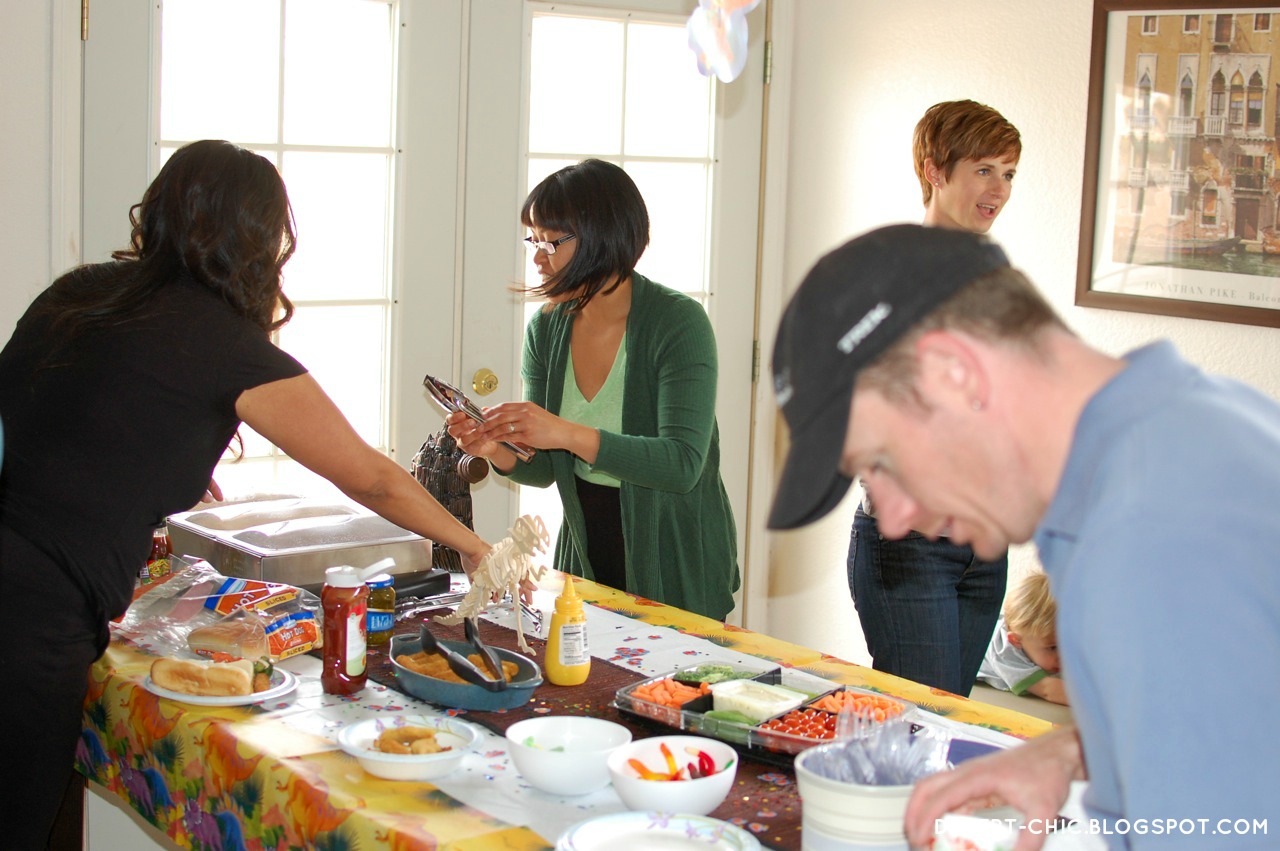
We had a fun party for my son's 5th birthday over the weekend. I scoured the Internets and particularly Pinterest to find some ideas for kids' activities. The three that we implemented were 1) decorating paper dinosaurs using empty paper towel rolls, 2) a dinosaur dig for these cool-looking dino skeletons, and 3) a dinosaur egg hunt (which was a cross between an Easter egg hunt and a scavenger hunt: each kid got a picture of the specific egg s/he was supposed to find). The last two ideas were found here.

The kids enjoyed themselves a lot, and the parents were great. The parents said they really liked all of the activities, which basically means we were on the same wavelength. :-) I think each of the activities struck a good balance between structured time and unstructured creativity, and it was easy to flow from the paper crafting to eating the buffet lunch, then to the egg hunt and dino dig, then to playing on the climber or hanging out at the sandbox with the beach shovels. This gave us time to defrost the ice cream cake a bit before singing happy birthday and blowing out candles.

Just a fraction of the decorations (sadly, I didn't have the presence of mind to take photos right before people started arriving.)


My husband took care of all the food and photography while I served as the point person for the guests and oversaw the activities. Some of the parents helped as we moved along from activity to activity, so it was fun for me as well since I could watch and laugh with them as the kids did their thing.

It was such a gorgeous day -- sunny and partly cloudy, warm, and with very little wind (the last of which is almost a miracle here) -- that at least half the party was set outdoors. If the weather had been inclement, we could have done all of the activities inside the house. I was really happy, however, that the kids were able to play on the new climber.

On the hunt

Action shot

More action

Taking stock of their egg treats

Digging for fossils

My husband did a fantastic job with the decorations both indoors and out, and it turned out perfectly.

Yummy ice cream cake from Cold Stone Creamery, although we did the dinosaur decorations ourselves since they don't have a dinosaur theme for their cakes.

You can see the cool dinosaur mouth on the arm of the kiddo's hoodie.

Two of my favorite ladies

This was the first time we threw such a structured birthday party. It was almost like throwing a baby shower. Usually our friends just come over and we chat and eat while the kids run around and go crazy over the toys and games in the house. Sometimes, like last year, there's a piƱata. But I did it differently this time because I also invited a couple of the kiddo's classmates, and I wanted to make sure there wasn't a lot of downtime for the "new" parents to get bored. It's hard to know how two different groups of friends will mix together. Since these two families were super-prompt to arrive (while our seasoned friends were over a half hour late and some of them more than that -- we're pretty casual as a group), I had the chance to talk with the moms while my husband talked with the dad that came, and he and I both really enjoyed our respective chats. These parents were also really helpful, and they were able to talk quite a bit with our family friends after they arrived. I'm glad that my son has made friends at school whose parents are great people, too.

xo, Gladys

Monday, February 25, 2013

Space Dome

On top of the world

So remember the playground climber that I spotted at our local Costco a couple weeks ago? Yeah, we bought it. I asked my mom and siblings if they'd be willing to pool money with me and my husband to get it for the kiddo's upcoming 5th birthday, and they were like, hell yeah! *grin*

My amazing husband spent much of his free time since then prepping the backyard -- drawing some plans, doing lots of digging, and buying the necessary items to create a mulched area. THEN he started putting together the climber, which comprised a surprising number of pieces and bolts. He braved near-freezing winds to get this done in time, but get it done he did. With some (very) last-minute help from me and the kiddo, the climber aka "Space Dome" (still available here) was ready to be climbed by the end of the day last Friday. And, barring any horrible weather, it should be available for playing during my son's birthday party this coming weekend. (Btw, the theme we decided on? DINOSAURS!)

The lovely mulched area ready and waiting (with random piece of rubber siding that needed to be thrown to the side) (See also the vegetable patch in the background right, also ready to be sown with new seeds in a few weeks!)

My husband hard at work, as usual

All put together and ready to be moved onto the mulch

I think this thing looks so cool. I love the colors, the size, the shape.... It's perfect for our backyard, which we decided not to plant with sod grass and simply leave as dirt. With the vegetable patch and the climber, it's coming along nicely. And I'll admit that I'm excited like a kid about having the climber in my home. :-) I used to love climbing apparatuses like this when I was a kid -- anything where I could hang or swing like a monkey. Now that I'm a creaky old adult, I can no longer climb like I used to, but I have nice flashbacks when I watch my son. Moreover, he's always been a more physically-cautious kid than I was, so this is a great way for him to test and expand his limits on a regular basis. Thanks to his mama-grandma and auntie and uncle for such a great birthday gift!

xo, Gladys

Wednesday, January 9, 2013

Gift Haul: Art and Aliens in the House

Exquisite painting titled "Area 51" by artist Jean Vengua, via Etsy

This past gift-giving season was pretty intense for me and my husband. We celebrated our 10-year wedding anniversary in late November and, almost automatically, the celebration converged with the holidays. Thanks to his generosity, I made out like a bandit (although he didn't do so bad himself!). He bought part of my beautiful green Fluevog Elizabeth mary janes. And if you know me, you know I consider many Fluevogs works of art. Those shoes were more than enough. But he didn't stop there. Here are some of the other gifts he gave me, stocking stuffers and bigger. You might notice a theme or two. Maybe. :-)

My very own Doctor Who TARDIS! Well, printed on a beach towel, anyway. I don't know if I should use it or just hang it up in the craft/sewing/guest room. Hmm, decisions, decisions. :-)

Fluevog playing cards!

A book of Doctor Who sticky notes

What the notes look like -- fun!

Fluevog Angel key ring

There was also an owl purse hanger from Etsy. It's one of those hooks that you can attach to a tabletop at a restaurant or bar so you can hang your purse if there isn't a convenient method otherwise.

For my part, I gave him a pair of gorgeous black Fluevog CBCs (still on layaway), various drill bits and other electronic gizmos for his fabrication projects, and also -- my favorite -- some art prints.

I got him the art print below for our anniversary. It's called "Aloha" by Nidhi Chanani and it was just absolutely perfect for us, especially given that we had just come back from a vacation in Honolulu the month prior. I love that they actually look like him and me, well, coloring-wise. What a lucky find, for which I must thank Joanne who referred Chanani's work. The print is in a cheap frame of a standard size which is why it looks a little weird and off-center, but we wanted to put it up right away.

Print of "Aloha" by Nidhi Chanani

This one below was more for the "house" but really it's about us and what we love as a family. It's a mashup of two things we love from two different media -- Maurice Sendak's famous children's book Where the Wild Things Are and some unforgettable characters from film animator Hayao Miyazaki's oeuvre. Joanne also referred Justin Hillgrove's work to me, but our friend BJ Reyes was the one who gave me a heads-up on this particular print. Only thing is, we need to have it custom-framed as we can't find anything close to the dimensions of the print.

Print of tribute art "Studio Ghibli (Hayao Miyazaki) / Where The Wild Things Are tribute (Maurice Sendak)" by Justin Hillgrove

By the way, the alien doll painting at the head of this post was purchased by me for ... well, me, but it was done in the same spirit as the gifts my husband and I gave each other. I also can't tell you how thrilled I am to own such a gorgeous ORIGINAL work of art. I've done that only one other time in my life, and both times I felt like I got the better end of the bargain. The rest of my art purchases have been of prints. Anyway, Jean Vengua is incredibly talented in many arenas (she's a friend of mine as well), and if you like any of her work from her Etsy site, you're able to purchase prints of her paintings via Bluecanvas instead/in addition.

xo, Gladys

Monday, August 6, 2012

Garden + Recipe: Marinara Sauce from Scratch


This is probably the last large harvest of the season. Picking tomatoes is back-breaking work! Props to all the tomato (and other vegetable/fruit) pickers out there.

I would say 80% of the tomatoes on this harvest were perfect-skinned, meaning no splits, holes, or any other blemishes. Perhaps all of the caterpillars and other bugs that were eating them before have transformed (into moths or butterflies) or died off.

I used up all of the tomatoes from the last huge harvest to make spaghetti meat sauce (with ground beef and sliced hot dogs, yummy...), so it's time for another batch of marinara sauce. I might then use the sauce to make stuffed bell peppers with meatloaf or burrito meat, and also skillet chicken parmesan. Other possibilities for the tomatoes: chocolate chili, salsa, and/or a simple BLT salad.

For the eggplant, I'm planning to make a Filipino eggplant torta -- I'll post pictures and explain the recipe if I get around to it. (Ahhhh, so hungry now!) In the meantime, here's the marinara recipe that I use.


Marinara Sauce
Makes about 1 quart
(from Lidia Bastianich's Lidia's Italian-American Kitchen cookbook)

Ingredients
  • 1/4 C extra-virgin olive oil
  • 8 cloves garlic, peeled
  • 3 lbs ripe fresh tomatoes, peeled and seeded*
    OR one 35-oz can peeled Italian plum tomatoes, seeded and lightly crushed, with their liquid
  • Salt
  • Crushed hot red pepper
  • 10 fresh basil leaves, torn into small pieces

Method

Heat the oil in a 2- to 3-quart nonreactive saucepan (like stainless steel) over medium heat. Whack the garlic with the flat side of a knife, add it to the oil, and cook until lightly browned, about 2 minutes.

Carefully slide the tomatoes and their liquid into the oil. Bring to a boil and season lightly with salt and crushed red pepper. Lower the heat so the sauce is at a lively simmer and cook, breaking up the tomatoes with a whisk or spoon, until the sauce is chunky and thick, about 20 minutes. Stir in the basil about 5 minutes before the sauce is finished. Taste the sauce and season with salt and red pepper if necessary.

GLADYS'S NOTES: I actually purƩe the sauce in my blender once it's done because my guys don't like chunky tomatoes. :-) Also, don't be scared how much salt you end up putting in; just taste it every so often while it's cooking. One last thing is you can use dried Italian herbs if you don't have fresh basil on hand.


* If you want instructions on how to peel and seed fresh tomatoes, here they are:

Peeling and Seeding Tomatoes
  1. Put a big pot of water to boil. In the meantime, prepare the tomatoes by cleaning them, coring them (like strawberries), and slicing a shallow X on the bottoms.
  2. Also prepare a big bowl of ice water -- with lots of ice.
  3. Once the water is boiling, carefully put the tomatoes in there and boil for 1-2 minutes. Then fish them out with a slotted spoon and drop them the bowl of ice water.
  4. After a few minutes in the ice water, the tomatoes should be easy to peel.
  5. Once peeled, slice or even tear them in half, and gently squeeze out the seeds over a strainer that is set in a big bowl. This will ensure that you keep the liquid as well.
Once peeled and seeded, the tomatoes are now ready for the marinara recipe. Enjoy!

xo, Gladys

Thursday, July 19, 2012

Garden: An OMG Harvest

After yesterday's post on the garden, I wanted to share this photo of the most recent harvesting. My friend M and I harvested the garden yesterday and we ended up with a ridiculous amount of beautiful tomatoes -- all three varieties, Best Boy, Early Girl, and Roma. I also picked some green bell peppers because they were so big, they were practically begging to be picked and subsequently sliced and fried up or stuffed with seasoned ground beef and cheese. (My stomach just interrupted to say "Mmmmmmmmm...")


I knew there were a lot of tomatoes, but I had no idea how many. And we didn't even get them all. (And some we even threw right into the compost bin because they were overripe or split open.) There are still bunches close to the ground, underneath layers and layers of foliage and still-green tomatoes on the vines. For fear of getting bitten by spiders, lizards, or other creatures down there, we let those bottom tomatoes alone. Our hands thanked us.

xo, Gladys

Wednesday, July 18, 2012

Garden Update + Outfit


Harvesting the garden is getting fun. The tomatoes are especially tasty and useful. Just yesterday I made a delicious marinara sauce with three pounds of tomatoes that were sitting on my counter ripening for about a week. It was my first time blanching then peeling tomatoes, and it was relatively easy. The sauce tasted like I went to a fancy restaurant, that's how good it was. The secret? Good extra-virgin olive oil and LOTS of garlic. I also like to think that our tomatoes are particularly tasty (our friends say so, anyway). I'll post the recipe here sometime.


This is the first time you've seen that we're also growing chili peppers since I've neglected to photograph the plants, which are in a different part of the yard. We've got six plants, two varieties, and they're all flowering. I hope these turn fire-engine red.


And as promised in the post title, here I am wearing a couple of items from my Old Navy shopping haul, the neon green striped coverup (which I would definitely wear on its own as a dress) and aqua blue flip-flops. Sorry I didn't do my hair or wear makeup. Getting in the pool right after dolling up kinda ruins the effect. There will be a party this weekend, so I hope I'll get decent outfit photos then. :-)

xo, Gladys

Monday, July 9, 2012

Summer Swim

It's hard to believe that July is almost one-third of the way done. The month shot out of the gate and hasn't stopped racing since! My son and I ended our once-a-week Mommy and Me summer class at the end of June, only to start thrice-weekly swim lessons with six of his young friends at the beginning of July -- or last Monday, actually. I feel like it's been a lot longer than that! The constant house-cleaning has probably gotten to me already. (I'm not very good at keeping house, to be perfectly honest. But the lessons are at our pool so we've got to keep the house relatively tidy; I even put my chores on a schedule in my iPhone, which beeps whenever I need to do a certain chore.)


On the upside, it's been lovely hanging out regularly with my friends here, eating yummy food together after working up an appetite in the water. Case in point: last Friday, from whence the photos above came. Spouses had the day off from work and other family was invited, so it was a big party that lasted about ten hours. I didn't expect such a long get-together but I was loath to see guests leave before dinnertime. The pool water was wonderfully warm (thanks to a very effective pool cover) and we didn't stop swimming until 5:30pm, more than four hours after the swim instructor left. Then we had pizza with homemade toppings (you should try roasting thinly-sliced red onion and green peppers with some olive oil in the oven then putting them on top of a plain cheese pizza -- heavenly!), popcorn, and sorbet. We also had the kids watch the classic 1984 film The NeverEnding Story for the first time. They were scared at times but they loved it.

And that, to me, is what a memorable summer is all about. :-)

xo, Gladys

Tuesday, July 3, 2012

Garden: Harvest Time

The vegetable garden is finally ready for harvesting!


On Sunday we picked tomatoes, bell peppers, carrots, lettuce, and even a bit of broccoli, and we ate the carrots for afternoon snack and made dinner with the peppers and broccoli that same evening! (We made pepper steak served with rice, and my husband and son gobbled up most of it with me.) We actually waited a little too long for the tomatoes, since a couple of them were so red and ripe that their delicate skin ripped off as I picked them. We'll pick them sooner next time; there are so many on the vines that we'll have a plethora of tomatoes this season.

On Saturday my husband uprooted one of the carrots to see how they were doing, and it was disappointingly small, dry, and not orange at all -- yes, despite how lush and full the carrot top was. We tried again on Sunday and came up with three decent edible carrots (albeit not very pretty), though the large one was blaaaaand. We're not sure what went wrong, but we'll probably tweak the soil and watering for the next round of planting. (We're planning to plant sweet corn next year as well. My mother-in-law tells us corn is one of the easiest things to grow.)


I took the following photos last week Tuesday and Wednesday, and the tomatoes and bell peppers were especially ready for harvest by Sunday.

Bunches of tomatoes turning orange and red (we should have picked them then):

The broccoli developing florets, slowly but surely:

Eggplants dropped from their flowers over the course of a day. The second photo on the right below shows an eggplant that we didn't even realize was close to coming out. We'll need to wait until they're substantially bigger before picking them, however.

The bell peppers are particularly large, beautiful, and plentiful. Some of them are supposed to be red bell peppers, so we don't know how long to wait for them to turn color. But we couldn't help picking four of the larger ones for dinner on Sunday night! They were nice and crispy and smelled wonderful:

This is how tall the bib lettuce is getting. Sadly the leaves all have a bitter aftertaste now, but my son still likes to eat them freshly picked:

To harvest, we poked holes through the mesh just big enough for our hands to reach through. So far the mesh seems able to maintain its structural integrity. We'll see if any rabbits or squirrels figure out that there are holes big enough for them to get through or to tear open even larger. So far, so good.

xo, Gladys
Related Posts Plugin for WordPress, Blogger...