Showing posts with label sewing. Show all posts

Monday, December 30, 2013

Sewing: Oliver + S Reversible Bucket Hat, Take 2

I didn't want to end the year without one last sewing project, and thankfully this one turned out okay so I can share it with you. Really, though, it's the model who's doing all the work here.


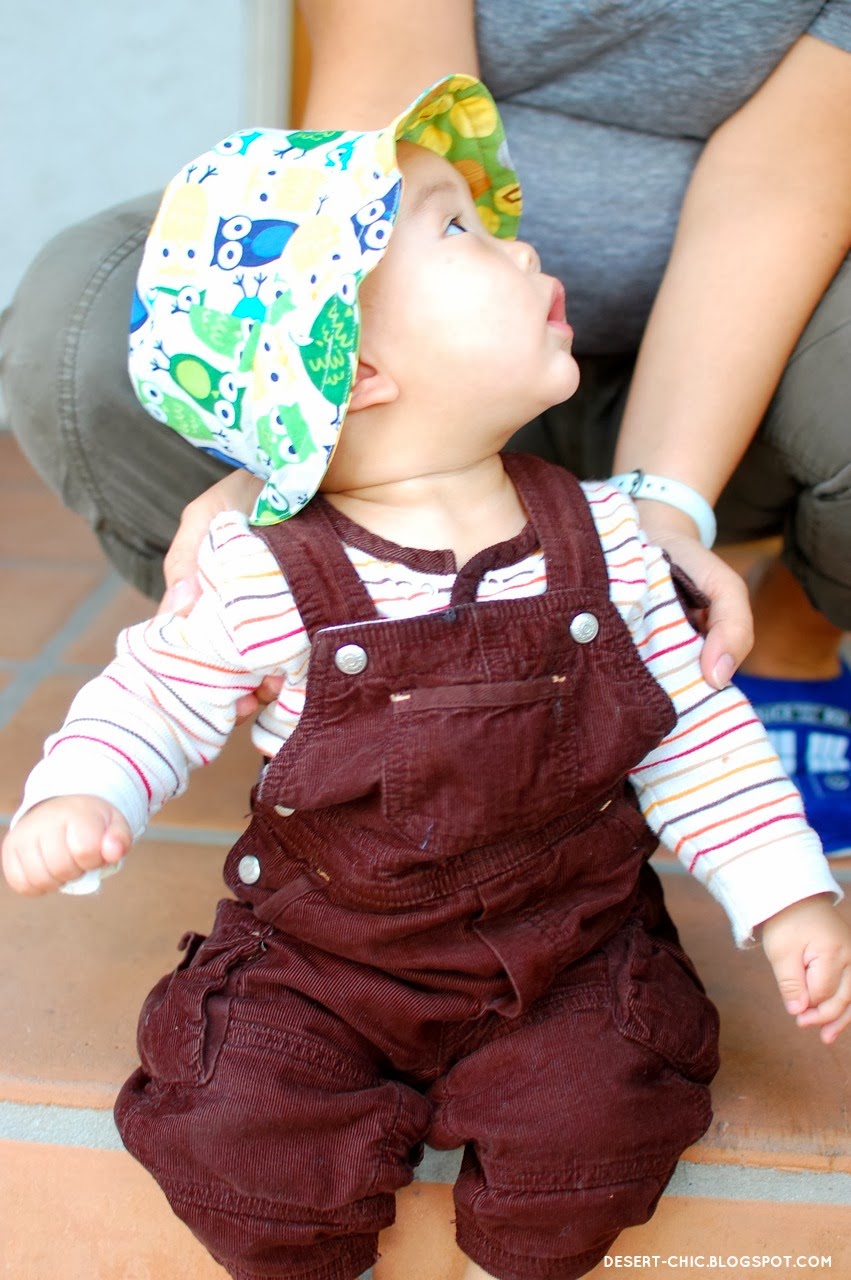
Even if a little blurry, isn't he utterly adorable? Those cheeks say hello!

This is my godson C wearing the reversible bucket hat that I made for him as one of his Christmas presents. If it looks familiar to longtime readers, it's because I have made this hat before -- from a free Oliver + S pattern available here -- and even used the same fabric for one of the sides (his mom picked the fabrics). This time around, however, I confess that I was pretty rusty due to not having sewn anything during the second half of the year. Sorry, C! Well, he doesn't really like the hat (yet), anyway. During the photoshoot, he kept taking it off -- hence the blurriness as I scrambled to take the photos in the waning light. His mom, my older sister, tried to help ... and I just wanted to point out the Doctor Who TARDIS slippers she's wearing in a couple of the photos -- another present from yours truly!

Speaking of which, I'll post some photos of our actual Xmas celebration, which sorta had a Doctor Who theme and made me seriously happy. And then there was the delicious food. And the adorable nephews. And the fun family conversations and music. I was in heaven!

Anyway, if you celebrate, I hope you had a wonderful holiday, too!

xo, Gladys

Thursday, June 6, 2013

Fifties-Inspired Fluevogs

Check these off my "What to Wear this Summer" list! These fun Fluevog saddle shoes, included in the previous post on unworn-to-be-worn shoes, actually saw some action last Saturday at a family party in Long Beach. It might seem like I cheated, but since I wrote the previous post (and just scheduled it to be published later) before wearing these out, I say it still counts! :-)

Gingham stretch button-down: New York & Co. | Capri jeans: Sonoma via Kohl's | Socks: Gold Toe (girls) via Target | Shoes: Fluevog Danielson (Frontiers family) (black/white still available and on SALE)

(Hmm, I think next time I wear this outfit, I'll skip the socks.) I wanted to wear the shoes with a 1950s vibe, so I wore the shirt even though it was a little too warm for the summer weather. I also wish my pants had been high-waisted instead, but at least I have a sewing pattern to make my own high-waisted denim capris (that hopefully fit better and end at the right length down my legs to avoid making them look shorter than they are). In fact, my outfit choice was inspired by this pic from the Butterick pattern I purchased earlier this year:


(I'd love to have legs that long!) This Butterick outfit would be perfect to make for the summer since the fabrics used are thinner than what's in my closet right now. But honestly I was just excited to wear the Fluevog shoes. Wondering now what to wear them with next.... If only I had a poodle skirt! But rolled-up jeans and thin oxford shirt would work, too. Or a fun red shirt and khaki shorts. I'd like to take these out dancing sometime. ;-)


xo, Gladys

P.S. The number 50 is coincidentally significant today. This is my 250th post on this blog! Can you believe it? I can't. Whoa.

Tuesday, May 7, 2013

Birthday Haul

Last year, I shared the awesome birthday presents that my husband gave me (geekery extravaganza!). This year he gave me Seasons 1-3 of Community AND made a generous payment towards my purple polka-dotted Derby Swirls currently on layaway at the Melrose store. I'll share pictures of those once I have them in my hot little hands! For today, I thought I'd share some of the lovely presents I got from other dear people in my life.

This shoe cubby bench (exact) came from my parents-in-law. It's perfect for our entranceway. No more shoe clutter in a house where we take our shoes off at the door. And it's a great place to set things down and sit for a spell. We'll have to replace those dinky little Ikea stools with something else, but we've got time to look.

E's presents spoke to the foodie in me. There was more delicious chocolate in her gift bag, but it was quickly and pleasurably consumed. That Bubble Bakery soap smells ridiculous (in a good way). The sweet coconut smell is so strong and real that it seems edible.

M's presents spoke to the crafter in me. This array of goodies was very inspiring. I love the framed snapshot of our group of mommy friends. I can't wait to go through the magazine, but most of all, I can't wait to try out the awesome vintage patterns she managed to find! I just wish I had MORE TIME. I'll probably try the plaid jumper pattern first.


ETA: I forgot to take a pic of these beautiful rice bowls from my friend MC. MC's house and household goods are just what I like, and these delicate little bowls showcase some of her tasteful style. I absolutely adore the colors!

xo, Gladys


Follow Desert Chic on Bloglovin

Monday, April 15, 2013

Sewing: Floral Apron

It's been quite a while since I sewed anything, but I recently busted out my machine and made yet another Lotta Jansdotter reversible apron over the weekend (for an extended family member). And because I didn't add pockets this time, it went relatively quickly. This makes apron #5 from this pattern. I've been looking for other apron patterns to try, but this one just matches my taste the best -- simple, flattering, but also versatile since it's reversible. So many apron patterns out there require ric-rac, ribbon, lace, and/or bias tape to finish them; and while I'm not at all against trims, I am more drawn to simple shapes and rely on fabric choice to "show off." Most of my fabric stash is patterned and I need to use it all up somehow. Besides, I tend to want to simplify patterns that require ribbon, as I did with this apron. I promise that it's not just laziness. ;-) If I add anything, it's usually pockets.


Confession: I'm not too fond of the combination of these two fabrics, but the receiver wanted browns. Since I didn't like the idea of using a solid brown for one side, I put together florals. Not as elegant (is that the right word?) as the other aprons I've made, but I hope she likes it anyway.

Tunic: fun 2 fun via ModClothJeans: GAPShoes: Fluevog Guide (Prepare family)
(Thanks to my mom for taking all the photos in this post!)

Bonus pic: Here's the outfit I was wearing when I modeled the apron. I wore it to go to a cousin's birthday party in Long Beach with the kiddo. This is one of the few tunics I have; I like the checks and the colors (I LOVED being able to wear my blue Guides with the outfit), but the style, which is trying for a mod 60s vibe, isn't as crisp as I'd like -- problem with the fabric and loose fit at the shoulders and bodice. I'll probably add it to my HUGE to-be-altered pile. Sigh. I still have my eye out on a more flattering tunic style, since I want dressy tops in longer lengths to wear over pants whenever I don't feel like wearing a dress to a party.

Oh, and did you notice the tattoo on my left arm? It's a temporary tattoo (of dinosaurs) that is still going strong after almost a week. Weird. It might be time to take some rubbing alcohol to it. But I'll admit that it's made me consider a bracelet tattoo on my upper arm. Maybe I'll get one in a few years, perhaps for my next milestone birthday...? :-)

xo, Gladys


Follow Desert Chic on Bloglovin

Friday, March 15, 2013

Pattern Haul

A few weeks ago, I received an exciting package in the mail, full of the sewing patterns I bought from Butterick and McCall during their recent sale. I'm pretty sure I won't get to all of them anytime soon, but a girl can dream ... and be inspired. My new patterns include lovely retro styles, something to make for my little guy, and even yoga pants!

Speaking of activewear, I have something really exciting cooking up for the blog. If you wear a U.S. size Small* in tops and/or bottoms (not petite sizing), then I've got a GIVEAWAY you might like. :-) Come back early next week and I'll have the details.

Retro style and vintage

Classic pieces

For my son and all of his younger boy cousins

Some activewear -- an attempt to motivate myself for the coming warm seasons

xo, Gladys

* U.S. Small in tops: 34" bust; Small in bottoms: 26.5" waist and 37" hips.

Tuesday, February 26, 2013

Sewing PSA

There is currently a $1.88 pattern sale going on at Butterick/McCall's/Vogue Patterns online, only through this Thursday, February 28, so get cracking!

Check out the Retro Buttericks on sale. I heard about the sale from one of the designers (Gretchen of Gertie's New Blog for Better Sewing). Love her newest patterns (see one of them above), and I'm definitely getting them. I'm actually feeling a little overwhelmed going through everything. Besides the retro patterns, I'm getting patterns for kids, especially boys. Have fun!

xo, Gladys

Friday, February 22, 2013

Sewing: Classic Stripe Apron


My love affair with this Lotta Jansdotter reversible apron pattern continues -- it's my FOURTH one so far. (Here are 1 / 2 / 3.) After the first one (for Joanne, who looks ridiculously adorable in hers), I decided to make one for all of my close friends here for their birthdays because the apron looks fabulous on everyone. I have to say, I think it looks a little better on folks with a larger bust area than I do, so my friends have that covered. ;-) Anyway, I've got one more to go later this year.

This one was for super-cute S, who mostly wears solids for a very classic, low-key look. She's a runner and prefers wearing loose, comfy clothing. (I also found out that she loves paperboy caps, which would look great with her current hairstyle. Note to self for her birthday next year.) I almost chose dark brown or black but then decided to use something brighter. It helped that right before I sat down to make the apron, I saw her wearing a lovely red-and-gray striped sweater top; and it looked so great on her, I knew I had to make a fabric run after that. This striped fabric was the closest to that design that I could find. (Jo-Ann's Fabrics seriously needs to carry more striped fabric, especially since they have such a large selection of woven fabric. Anyway.)

Construction-wise, I liked the one large pocket at the thigh area that I made the last time and so I did it again. I also learned my lesson from last time and made sure to buy 1.25 yards of each fabric even though the pattern only calls for 1 yard each. I'm so glad that, this time, there was no scrambling and piecing together different fabrics to make the apron; while it turned out OK for the last apron, it would have ruined the classic look for S's apron.

A small meditation on sewing: I thought that I would get a lot faster sewing this pattern by the fourth time, but sewing is just a time-consuming project. Measuring and cutting take the longest, and perhaps I take longer now because I'm more careful about measuring. BUT, I have shaved off some time since I first made this pattern because 1) I wasn't pulling my hair over the pleats, which I figured out by the second time making the apron, and 2) I didn't need to use my trusty seam ripper at all. Oh, right, I also didn't have to do extra piecing since I had enough fabric. Hooray for the small victories!

xo, Gladys

Monday, February 11, 2013

Sewing: Oliver + S Tote Redux

It was an unusually busy week for me last week, and only now do I feel like I can breathe deeply again. In between various errands, dental appointments, impromptu babysitting, an appointment with an accountant, a birthday lunch, a birthday party, and a school field trip with my son, I managed to squeeze in some time for a couple of sewing projects. Here's one of them, an Oliver + S Mother-Daughter tote (free pattern) for my niece's 8th birthday.


If that sounds familiar, it's because I used this same pattern before to make totes for my 9-year-old twin nieces last fall (all three young ladies are cousins). Here's the purple tote:


As you can see, I tweaked the pattern by using one large stripe for the middle instead of two smaller ones, and using the same complementary solid-color fabric for the bottom, top stripe, and handles. While I loved the original patchwork feel, I was going for a different, more elegant look. I was inspired by the dragonfly/butterfly fabric and knew that I couldn't simply use it as an unrecognizable stripe on the tote. So instead I decided to "frame" it and make it the centerpiece. (If you're interested in how I dealt with the dimensions, I simply added the height dimensions of the two middle stripes, from 3.25 inches each to one larger piece that was 6.5 inches. The height dimension of the lining had to be increased two inches to 23 inches. The rest of the dimensions remained the same, but the change resulted in a slightly taller tote than the original.) I think the tote turned out wonderfully, and this time around I was more meticulous about cutting the pieces and doing any necessary trimming as I went along so that the seam edges matched as closely as possible (though unfortunately still not perfect).


Here's a closeup of the awesome dragonfly/butterfly fabric, superimposed with different handwritten designs appearing to be the work of a natural historian or entomologist. The fabric design is both lovely and intellectual, and I thought it would be appropriate for a youngster who is exceedingly bright.


I don't have a photo of the inside lining, but for some fun I used this colorful stripey fabric which might look familiar to long-time readers. I used the same fabric to make an art smock from another Oliver + S pattern last summer. For this tote, I had the stripes going horizontally since it looked better that way. I wanted to use a colorful fabric for the lining because I personally get a kick out of seeing polka-dotted or brightly-colored linings in elegant leather purses or wallets. The contrast makes me feel like I've got a fun little secret, like when I wear bright patterned socks underneath pants or boots. Just one of the things that float my boat. :-)


xo, Gladys

Monday, January 28, 2013

Sewing Inspiration: Enchantment under the Sea Dress

One of my goals this year is to finally make a dress for myself (my Halloween Regency dress doesn't count because I can't wear it more than once a year).

After buying Stitch Savvy: 25 Skill-Building Projects to Take Your Sewing Technique to the Next Level by Deborah Moebes of Whipstitch, I think I've found the perfect candidate. It will be great for spring and summer. I mean, look at it!


Granted, I'll probably make the option with the straps. After having a kid, my body just ain't built the way it used to be. ;-) This is made with regular quilting cotton, too, so it'll be something that won't stretch my limits too much but will still be lovely and fitted to my measurements. Looking forward to it!

xo, Gladys

Friday, January 25, 2013

Sewing: Wonder Woman Stuffed Pillow


This stuffed pillow was an Xmas present for Joanne, who is a huge Wonder Woman fan. (She's still on a search for the perfect Wonder Woman boots for her.) As you can see below, it was meant to be a stuffed doll. I bought the fabric from Spoonflower, and I was quite excited to make it. However, after I carefully cut out the front and back according to the directions, I found out to my deep dismay that they were not mirror images as they are supposed to be if you're going to sew them right sides together. Fabric design FAIL. So while it is a cute image and a great idea, you should know this before buying the fabric yourself.


What to do?

Well, it took me a while to commit to it, but I decided to applique the Wonder Woman cutouts onto fabric and create a stuffed pillow that would complement the birthday pillowcases I made for her. For added strength and to prevent the fabric from wrinkling while appliqueing, I used fusible web (Heat'n Bond Lite) on the backs of the cutouts, then I ironed the cutouts onto the pillow fabric.


Above is a closeup of the applique. Not too shabby ... but this is another skill that I'd like to practice and perfect.


Here are both sides appliqued. I pinned the fabric right sides together and sewed the edges of the pillowcase closed, but I left about six inches unsewn so that I could stuff the pillow.


Now time to stuff. These huge clouds were Poly-Fil and I used the majority of my bag. After stuffing, I stitched the opening closed by hand, using an even slipstitch.


All done!

Here's an iPhone photo of all of her three pillow(case)s together, courtesy of Joanne. (Nice Fluevog sandals, chica!)


xo, Gladys

Wednesday, January 23, 2013

Sewing: Pillowcases Galore

I made several pillowcases for holiday presents this past season. I'm embarrassed to say that one pillowcase took me until last week to finish, but they're all finally finished and mailed off. I'm saving the last-made one for a later post this week, but here are the rest. They are all fun in their own way.

Yoda


You've seen me make a pillow like this before ... except the back fabric is different, and at this point I've basically perfected the envelope pillow cover. I made this for my dear friend Dorothy (one of the MotleyFlue), who loves Master Yoda. The measurements on this baby are almost exact. French seams inside. I dig how badass Yoda looks.

Thomas and Friends


My nephew wanted another set of Thomas pillows for Xmas. I made a set using different fabric for his birthday last September, but I didn't blog about it. I sewed the previous pillowcases as envelope covers. These are more like the typical pillowcases that you buy, open with a wide hem on one end. I just used a standard-size pillowcase that we already had to create my measurements. Again, my measurements for these were meticulous, and they needed to be because of the directional prints.

Invisible Zipper


I made these color-block pillowcases for Joanne's birthday which was in early December ... and, um, she hasn't received them yet. (She'll get them along with her also-late Xmas present, hopefully by tomorrow.) She asked for simple pillowcases to brighten up her couch, but I couldn't make the easy version, i.e. envelope. I knew I needed to use zippers on these. Thing is, I'd never sewed zippers on the edges like this, and I'd never sewed invisible zippers before. I had to do tons of research and look through different tutorials online to psych myself up to do it. In the end, it worked, though I used a slightly different method for each pillowcase. The stuffed pillowcase above isn't how it's supposed to look, but I just wanted to show you how invisible the invisible zipper actually is. (It's supposed to look more full and stuffed; I used a smaller pillow form than what Joanne has, just for demonstration purposes.) I'm happy with the way they turned out, but I am planning to practice sewing more invisible zippers. It's not that difficult, but it is a somewhat fussy business, and this is one of the sewing skills I'd like to perfect ... because I am seriously planning to make a dress for myself in time for spring. :-)

xo, Gladys

Friday, January 11, 2013

Sewing: Small Totes for Small Ladies

I'm so behind on blogging that I'm still recapping the holidays. But I wanted to share this anyway.

So last month I sewed up these tote bags from another Lotta Jansdotter pattern for a couple of little girls among our family friends here. It's a quick beginner's pattern that would be easy to embellish and adapt, and it went even faster for me since I didn't make the handles from fabric but instead used cotton webbing that I already had on hand from another project. It's not a perfect combo especially from an aesthetic perspective, but at least I know the handles are sturdy enough for preschoolers. The bag itself is pretty sturdy at the bottom since the contrast fabric is folded over the bottom of the bag, thereby creating a lining there. The totes can be stuffed with books and other fairly heavy things, and they should hold up well.


My only complaint about the pattern is that I wish it had included a note about using directional prints. Since both pieces of fabric are folded in half to create a seamless bottom, using a one-directional print (as I did for the larger fabric of both of these totes) means that one side will be upside down. I wasn't able to figure it out from reading the instructions or looking at the illustrations. If I'd known that ahead of time for the pink cat bag, I would have cut the fabric in half then sewn together the resulting two pieces so that both sides of the bag would have the print right side up. I guess I could have redone the bag (using my trusty seam ripper) but it didn't look too bad and I was on a deadline. I made the adjustment for the kitty-people tote, however.

Speaking of which, I really love this kitty-people print. I'd used it before on an apron I made for a friend's birthday last October, and this little tote was a good use of some of the remaining yardage that I had. The recipient told me she liked it a lot, and I saw it packed absolutely full with clothes and a huge stuffed bear. It ended up being the perfect size for a four-year-old. Success!


xo, Gladys

Monday, January 7, 2013

Sewing: Autumn Apron


I made this reversible apron last month for my friend E's birthday. It's the same Lotta Jansdotter pattern as the cupcake apron and the kitty apron. This time, I stuck one extra-large pocket well below the waistline on each side. I really liked this print on E's apron. Her favorite season is fall, and she loves leaves as well, so I thought this print would be perfect. (My personal favorites are the apples and butterflies, and the colors are fantastic.) The only problem I had with sewing this apron was that I ran out of the solid burgundy fabric.

Note to self: when buying solid fabrics at Jo-Ann's, buy extra because these bolts are less than 44" wide ... which makes a huge difference with this particular pattern.

To make up the difference, I had to use the second yard of the print fabric that I was saving for another project. You can see in the photo below that the side/back panels are made with the print fabric instead of being continuous with the solid fabric. Oh well. E says she loves it anyway.


Here's a closeup of the fabric print, which I really, really like. I bought it on sale, too. Should have bought an extra yard.


xo, Gladys
Related Posts Plugin for WordPress, Blogger...